Akamai Storage
Locktera Share + Akamai NetStorage Integration Guide
Locktera Share supports S3-compatible storage, allowing customers to connect their Akamai NetStorage environment for secure file handling and access control.
Note: Akamai NetStorage offers S3 API support through Akamai’s S3-Compatible API feature. Ensure it’s enabled on your account. You may need to work with your Akamai account representative to provision this feature.
Step 1: Enable Akamai S3-Compatible API
-
Contact your Akamai representative or log into your Akamai Control Center (https://control.akamai.com/).
-
Request S3-Compatible API access for your NetStorage CP Code and storage group.
-
Once enabled, you will receive:
-
S3-compatible Host Name (e.g.,
s3.<your-network>.akadns.net) -
Access Key ID
-
Secret Access Key
-
Bucket name (usually linked to your CP Code)
-
Step 2: Configure NetStorage Permissions
Ensure the access key has appropriate permissions for:
-
Uploading (PUT)
-
Downloading (GET)
-
Listing (LIST)
-
Deleting (DELETE) — if required
Akamai may manage permissions differently than typical IAM models. Confirm with support if you're unsure.
Step 3: Connect in Locktera Share
-
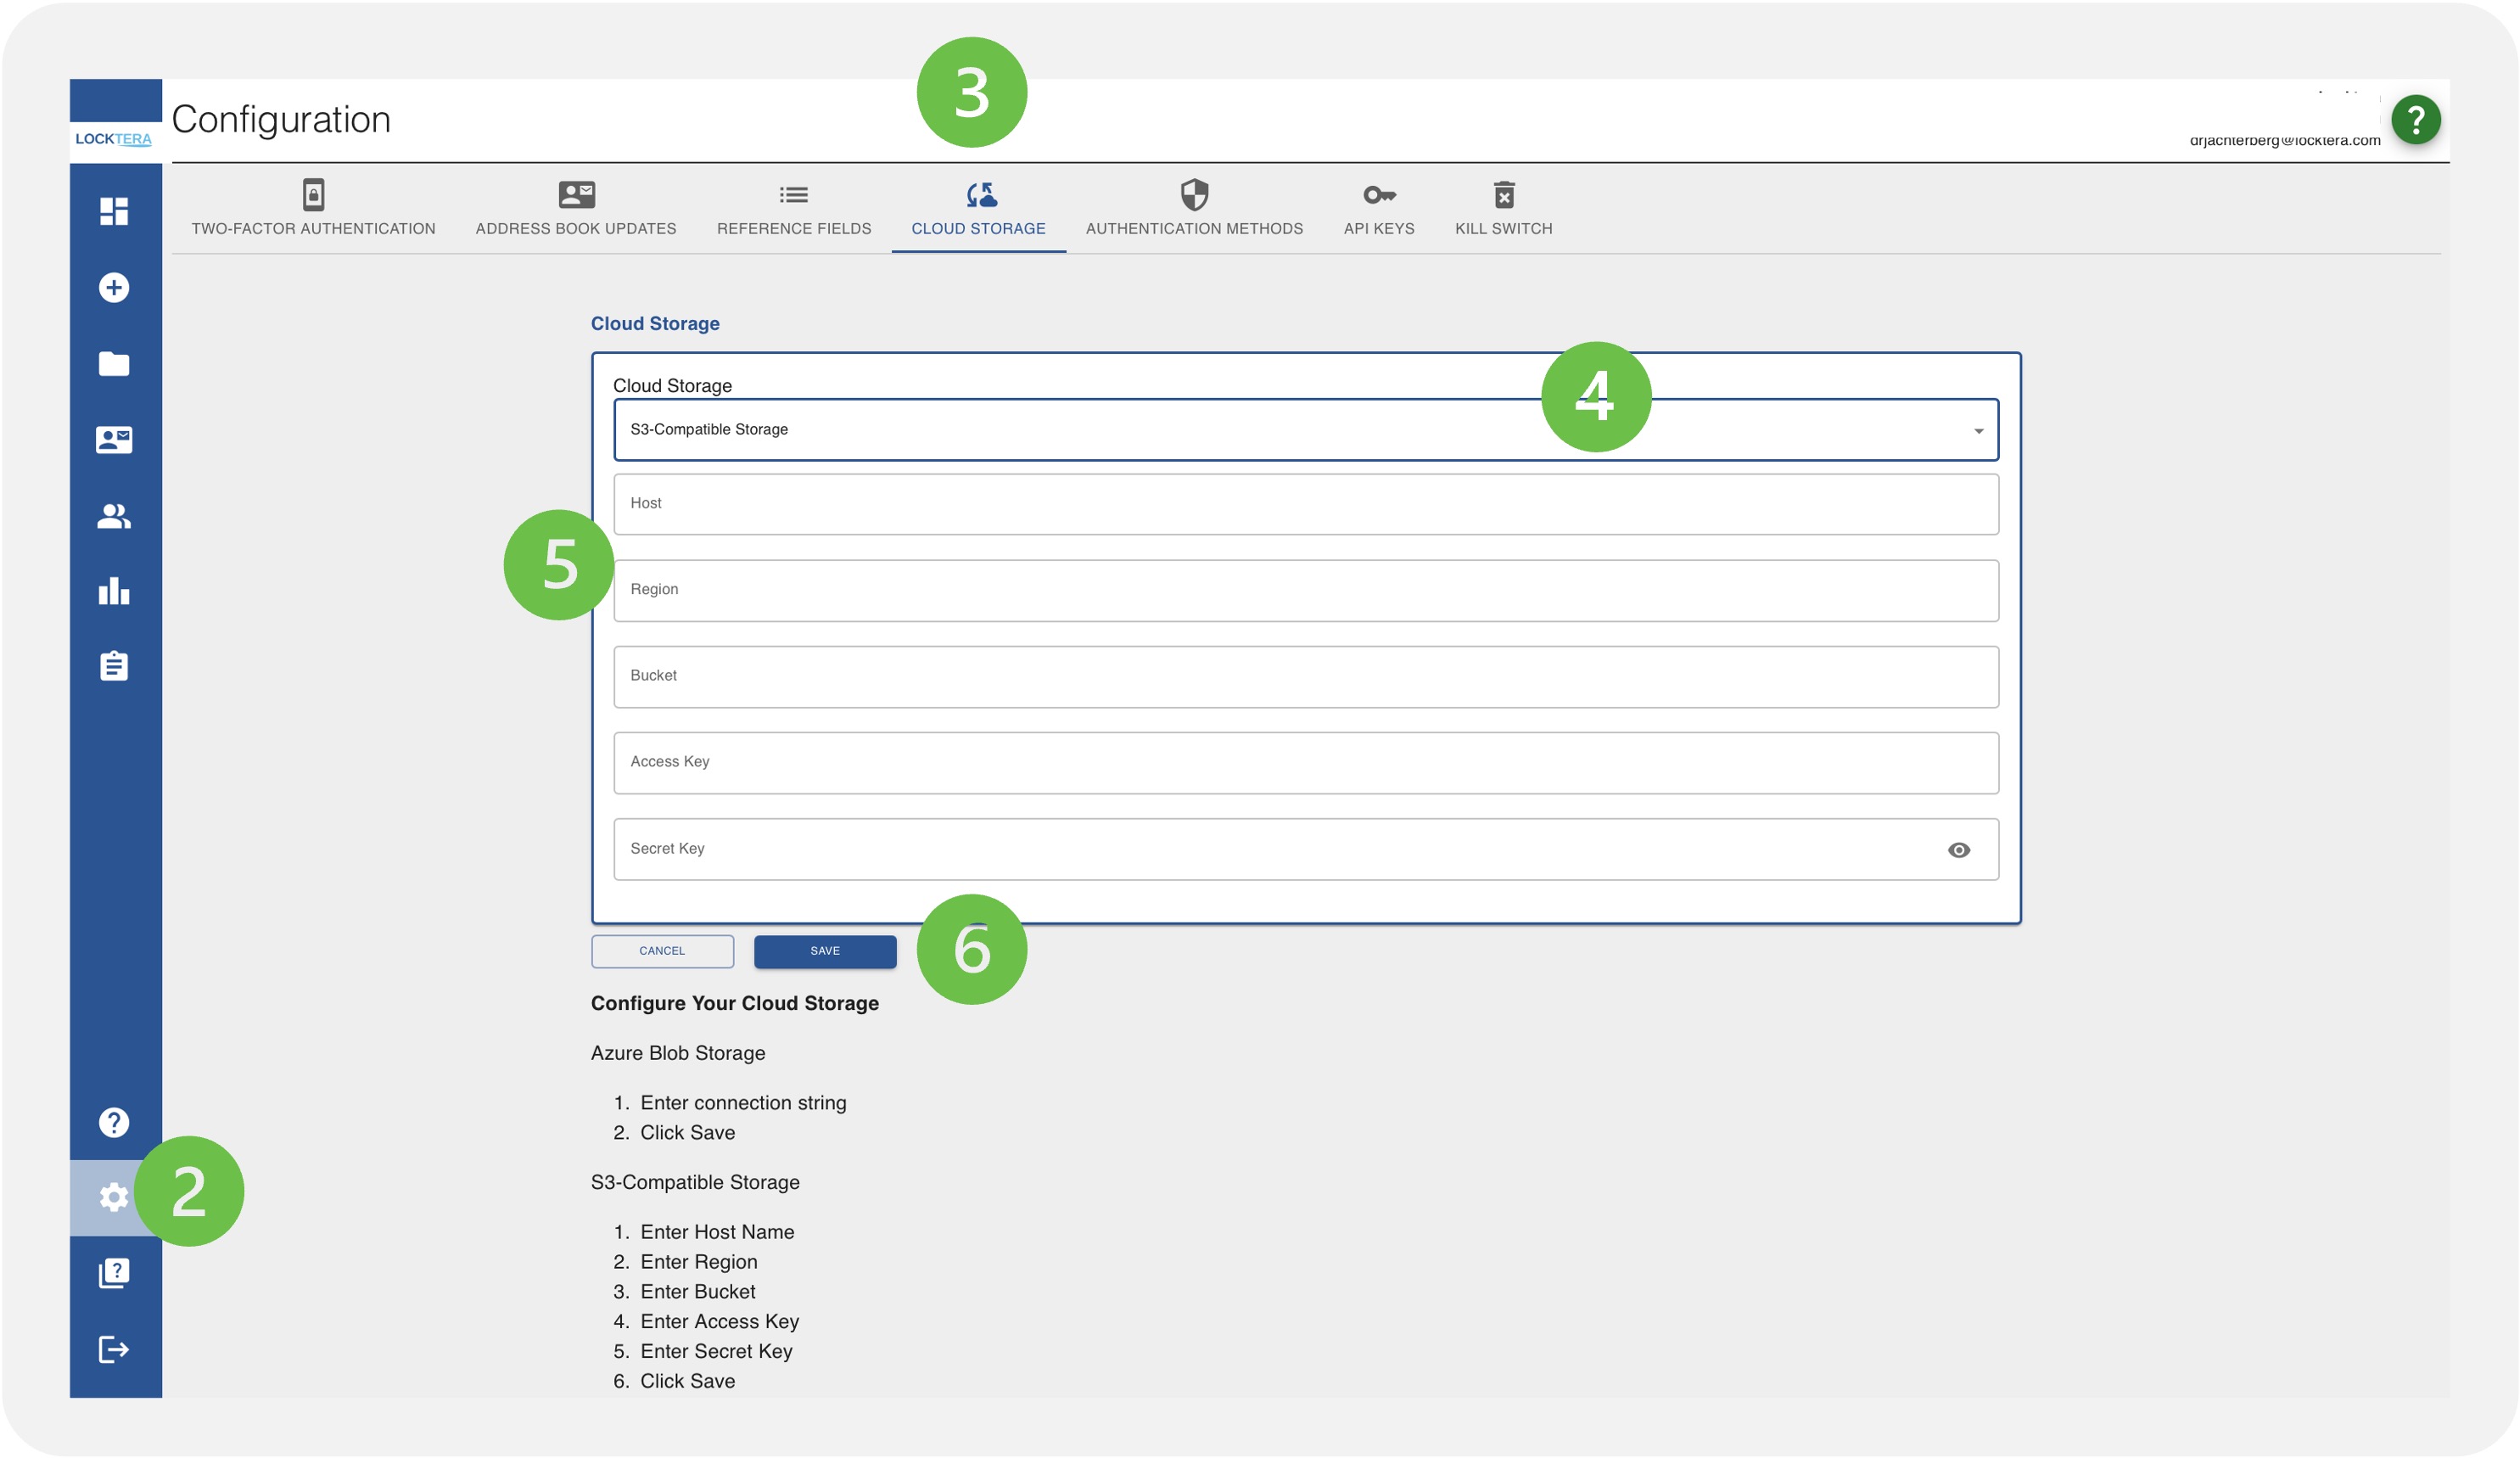
Log into your Locktera Share System Admin Portal.
-
Navigate to settings.
-
Click Cloud Storage
-
Choose “S3-Compatible Storage” from the dropdown.
-
Fill in the fields with your Akamai credentials:
-
Host Name: e.g.
s3.us-east-1.akadns.netor what was provided -
Region: Use the applicable region (e.g.
us-east-1) or enterauto -
Bucket: Your Akamai NetStorage bucket or directory
-
Access Key: Your Akamai-provided Access Key
-
Secret Key: Your Akamai-provided Secret Key
-
-
Click Save.

Best Practices
-
Rotate access keys periodically
-
Monitor access logs through Akamai’s reporting tools
-
Use Locktera’s file-level controls to manage who can see or download assets even after integration