Wasabi
Locktera Share + Wasabi Cloud Storage Integration Guide
Locktera Share supports S3-compatible object storage, allowing seamless integration with Wasabi, which is fully compatible with the AWS S3 API.
Step 1: Create a Bucket in Wasabi
-
Log in to the Wasabi Console: https://console.wasabisys.com
-
Go to the Buckets tab and click Create Bucket.
-
Choose:
-
A unique bucket name
-
Your preferred region (e.g.,
us-east-1,us-west-1)
-
-
Complete the rest of the setup and click Create Bucket.
Step 2: Generate Access Keys
-
In the Wasabi Console, go to the Access Keys tab.
-
Click Create New Access Key under your user or root account.
-
Note down:
-
Access Key ID
-
Secret Access Key
⚠️ Make sure to copy the secret key when it's shown—it's only displayed once.
-
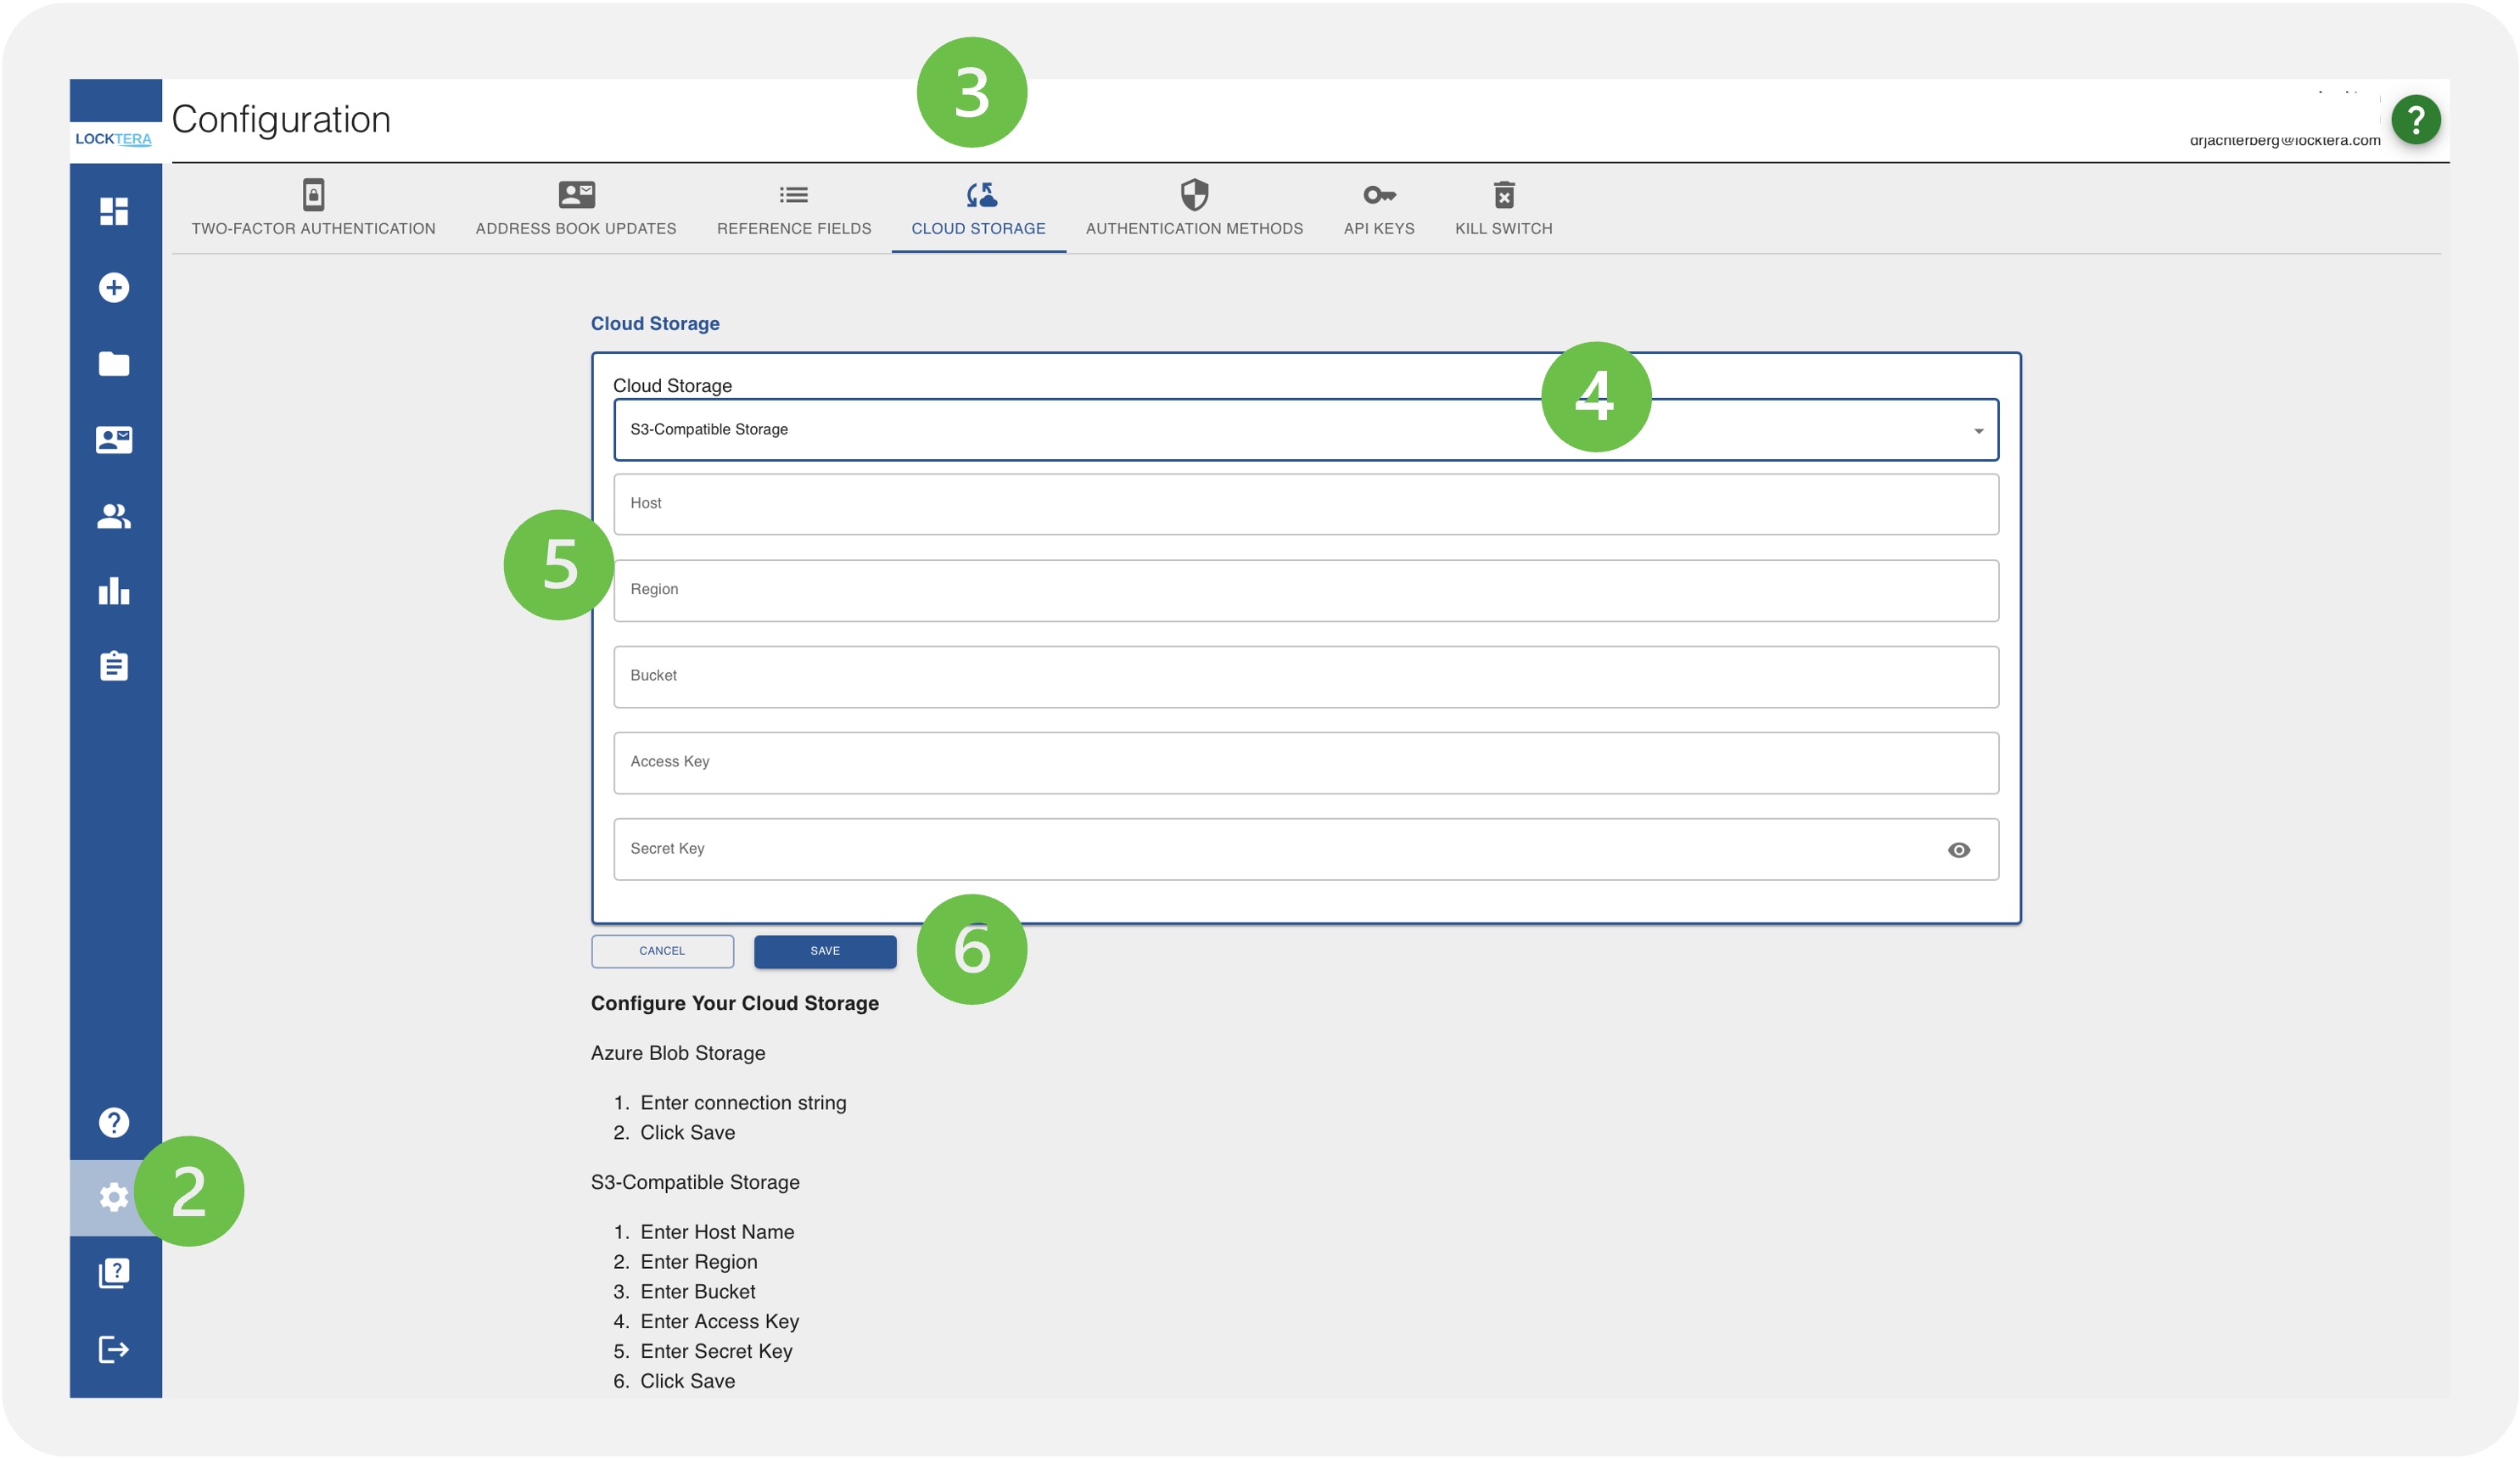
Step 3: Connect in Locktera Share
-
Log into your Locktera Share System Admin Portal.
-
Navigate to settings.
-
Click Cloud Storage
-
Choose “S3-Compatible Storage” from the dropdown.
-
Fill in the following details:
-
Host Name:
s3.<region>.wasabisys.com
(e.g.s3.us-east-1.wasabisys.com) -
Region: Same as your bucket region (e.g.
us-east-1) -
Bucket: The name of the Wasabi bucket you created
-
Access Key: Your Wasabi Access Key ID
-
Secret Key: Your Wasabi Secret Access Key
-
-
Click Save to complete the integration.

Locktera Share will now store and manage files securely on your Wasabi bucket, while enforcing file-level encryption and access controls.
Best Practices
-
Enable MFA for your Wasabi account
-
Rotate access keys regularly
-
Use Locktera’s access logs and expiration settings to protect shared content